HOW TO CHANGE YOUR PENDRIVES ICON USING NOTEPAD
show you how to set/change that annoying default background image in pendrive in windows 7
How to set
background image in pendrive in windows 7, 8, 10,etc. Also how change pen drive background image
without any software
- First Choose the photo you want to set in pen drive
background - Right Click on the image and open with Windows paint program
- After you open it Now navigate to save, choose save as
- Now save the picture using .bmp file extension
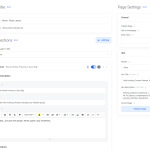
- Open notepad
- Save the following code
long as you keep the extension as .bmp)
- Now go to save
- Choose save as
- save the file as autorun.inf
- Save the two files (picture and autorun.inf files in the drive’s/usb folder
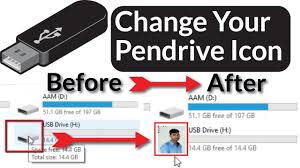
Save the file and safely eject your flash drive.
Now when you plug your flash drive into your computer (or any computer), it will have the new icon and name.
After pic
Once you’re finished, you may want to go back into the folder options and change the hidden files back to be hidden; some people find them annoying.
Create your icon, or find one online. …
Open Notepad to create your Autorun file.
Type [AutoRun] in the first line.
Name your drive in the second line: label=Name.
Specify your icon in the third line: ICON=your-icon-file.ico. …
Click File, then Save As. …
Once you have your .ico file, save it directly to the root of your flash drive (not in a folder).
Enable ‘Show hidden files and folders’ by clicking Start -> Control Panel -> Folder Options. Click on the View tab.
View tab chunk pic
Select ‘Show hidden files and folders’ and click OK.
Hidden files pic
Go to My Computer and open your flash drive. There should be a file titled “AUTORUN.INF”. If this file exists, skip to Step 6.
If there isn’t an Autorun.inf file, you’ll have to create one. Open Notepad and type:
[autorun]
Label=Removable Disk
Save this file as AUTORUN.INF to the root of the drive (not in a folder).
Right click AUTORUN.INF and select Properties. Uncheck the Read-only box. Click OK.
read-only box pic
Open the Autorun file and edit the text to look like this:
[autorun]
Label=What you want your drive to be named
Icon=icon.ico
Substitute your file name for the icon.ico (SNESalt.ico in my case)
autorun.inf text edit example pic
Save the file and safely eject your flash drive.
Now when you plug your flash drive into your computer (or any computer), it will have the new icon and name.
After pic
Once you’re finished, you may want to go back into the folder options and change the hidden files back to be hidden; some people find them annoying.
Watch Full Tutorial